Friday, November 30, 2012

Lily bulbs are tucked away for winter.

Bulblets can be left attached or planted separately.
Our midwinter harvest has been completed and bulb selections for the spring 2013 catalog are being being tucked into the coolers for winter.  To keep the lilies in pristine condition through the end of shipping in May, bulbs are packed into slightly damp peat and the coolers are slowly dropped down to where the surrounding peat is frozen solid.

Lily bulbs that are reserved for the early Flower & Garden or Home & Garden Shows are kept on a natural cycle, meaning they can go into your garden whenever the soil is not frozen. (Yes, you still need to water newly planted bulbs - to settle the soil - even if Mother Nature has been generous with the rainfall.)  For bulbs still left in inventory, we can safely ship until about the first half of December, while the weather cooperates.  Just before Christmas the spring catalog will be uploaded to the website and order buttons will be made active for spring delivery.

Last Christmas Sale of the Season - "It's a Wonderful Life in Fife"

Rare Alder Bowl with live edge

"Sourgum" Acrylic on gallery canvas
B&D Lilies will be at the Poodle Dog Restaurant, in Fife, WA -  one day only - December 18th for a very special event.  Karolyn Grimes, the child actress who played "Zuzu" in the Jimmy Stewart classic film will be the featured speaker at this unique Christmas Sale + Dinner + Film Showing.  The door opens at 8AM for early shoppers ($10) or at 10AM for only $3, if you bring two cans of food for Northwest Harvest.


Dianna will have Northwest Jewelry, the Silk Vietnamese Lanterns, her artwork and Bob's wood turnings, as well as at least a dozen varieties of lily bulbs to plant now.

Stop by on the 19th, its an easy exit off I-5
in Fife (first exit coming from Seattle, last if heading north from Tacoma).  Go west over the freeway and the Poodle Dog will be across the street.  Click on the link for more information.

"It's a Wonderful Life in Fife"


Saturday, September 29, 2012

Lily Bulb Harvest Update for 9.29.12


Nights have finally dropped below 40 degrees.

In our little valley, the vine maple leaves are beginning to turn orange and fall to earth, and our lilies are ripening their stems for safe digging and processing.  About 80% of the earlier blooming Asiatics and LA hybrids (L. longiflorum x Asiatic) have already been dug, cleaned, sized, and packaged, and have been tucked into a cooled holding area waiting for their turn to be transported to the bins in the shipping room.

Sometimes there are surprises underground.
The weather has been relatively dry this fall and most of the trumpet lilies are being harvested this weekend, following irrigating the field.  We are still checking Orientals and Orienpets (OT or Oriental-Trumpet hybrids) for digging next week, while a few early to bloom varieties on the ends of rows have already been processed.  (All bulbs will be out of the ground within the next 10 to 14 days, and on the 9th, Dianna will be celebrating her birthday while grading bulbs! - Bob)


Normal size bulblets on stem.

Look at the HUGE bulblets formed on this Asiatic!  Granted, these are larger than normal and the "mama" bulb was smaller than the others in the row, but that was because all of her energy went into producing bulblets (like raising kids).  These extra-large offsets will most likely bloom next summer, instead of needing another summer of growth before making a single flower like the smaller bulblets in the photo on the right.  As a size reference, the large bulbs on the end of the stems were all 14cm in circumference.


What can you do to encourage such large offsets?  

Some gardeners like to plant their lilies on their sides, but the bulbs generally "right" themselves anyway; some give their lilies too much nitrogen fertilizer, which actually weakens the bulbs and causes rot; still other gardeners plant in pure compost hoping for outstanding results, but during a wet year they risk losing the bulbs to rot over winter.  Rather than trying to manipulate nature simply feed your lilies a balanced fertilizer (5-10-10 or similar; we use Rose food) in spring and midsummer, water when the soil is beginning to dry two inches below the surface, and keep weeds and aggressive plants from stealing nutrients and water from your lily garden.

Not everybody is ready to dig.  See the green leaves?
How do we know when to harvest? 

As we "test dig" bulbs, we are looking for them to be a large enough size, as well as checking that the new "nose" (future stem) is being formed before harvesting that variety.  Lily bulbs mature at differing rates depending on breeding background, the specific cultivar within a type, and outside influences such as when fertilizer was applied, the amount of water received as well as air and soil temperatures during the growing season.

Shipping begins Mid October for the coldest regions.

In early October our database computer begins printing the orders that can be filled with varieties that are ready in the bins, even while the remaining bulbs are being harvested and packaged.   We look to be right on schedule to start shipping to the coldest areas of the USA the second week of October, with the warmer regions following soon after. 


Getting ready for shipping.
Delivery by region is best for lily bulbs.

Here's a link for information on preparing your garden early if you are concerned about freezing temperatures before your order arrives.  Lilies are shipped to the Midwest and East (and mountain regions) from Washington State Monday-Wednesday, and we generally fill West Coast orders Thursday-Saturday.  Shipping is dependent on cross-country weather, if the temperatures begin to drop more quickly than expected, we put the west coast orders aside for a time and we concentrate on the colder areas.

Southern areas are shipped the third or fourth week of October, or in early November.  Soil in mild winter areas needs to cool before fall planting, as lily bulbs do not have a hard shell like a tulip or daffodil and can be damaged by heat.

Priority Mail boxes and stacks of packaged bulbs waiting to go into the bins are stacked just outside the shipping room.   We use our coolers during summer to store our flower show equipment, and when fall shipping is completed and we start the winter harvest, we move the show equipment out of the coolers to the shipping room floor to make room for the lily bulbs.  Bulbs dug over winter are the ones we offer in our spring catalog.

Other blog posts you might have missed:

Green Stems on lily bulbs mean don't dig yet!

Winter care of potted lily bulbs.

Garden Cleanup, its never too early to begin.


Monday, September 10, 2012

How to Plant Poppy Seeds - Easy Instructions.

Lemon-Poppy Seed muffins are good to eat!
Poppy seeds are very small in size and add a quite delicious "crunch" to breads, cake and muffins, but did you know these beautiful flowers are easily grown in either full sun or bright shade?  Regular garden soils, not too rich with compost and other amendments is perfect.  Fast draining soils are a must however, and in gardens that are mostly clay -  a raised bed with native soil, sand and a light proportion of compost - will work just fine to provide enough drainage from heavy rainfall or accidental over watering.

Annual Poppy seeds (flowers in one season) can be planted anytime between fall and spring and you can collect the mature seeds to plant in another garden site for next year, use them in cooking or simply let the pods mature and fall in place - called "self sowing". 

Poppies need light to germinate, so if you cover these tiny seeds with soil, peat, vermiculite, or sifted compost they will not grow.  Fallen leaves from trees and shrubs can interfere with germination (cutting off the light), but snow is not a problem - as it melts, your poppies will begin to germinate whether they were fall planted by you or growing from mature pods dropped on the ground in fall.
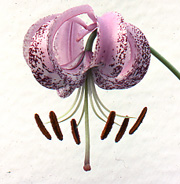
'Lankon' lilies with poppies growing in the row.

However, seed that has been buried and then
brought to the surface during garden cleanup, roto-tilling or planting of other flowers may even germinate several years later.

In spring of 2010, Dianna scattered surplus seeds of her 'Purple Poppies' in a bare section of field. 
Husband, Bob, not knowing what she had done, only saw Groundsel, Thistles and other weeds starting to grow in the "unused ground".  He tilled the soil, effectively cutting the seed off from light and so none germinated, especially with subsequent cultivation and planting of oats to build up the soil in preparation for a future lily crop.

When oats are used for a cover crop, they are thickly sown and tilled into the ground when they've grown about a foot tall in order to add nutrients and of bio-mass to the soil - vastly improving the soil texture.  Any poppy seed brought to the surface by the roto-tilling would not have had enough light to grow with the quick-to-sprout oats, or wouldn't had time to grow more than a few inches before those oats were dug into the soil. That fall a second round of oats were planted, tilled into the soil in late winter, and the lilies planted in March.  (See our blog post Semi-automated Planting of Lily Bulbs - where you can see an example of lush green oats growing in between lily rows.)

To everyone's surprise, after we finally left the soil alone for several weeks, a nice scattering of poppies began growing in between the lily sprouts - and were left to grow together over summer.  After all, who could weed them out with all they had been through?

"Plant poppy seed in a specially prepared bed".  


Dianna's Purple Poppies - flowers are 3 to 5 inches in size.
 1.  Plant poppy seed in a specially prepared bed, cleaning out perennial weeds from an area about 18 inches across for one or two packets of seed.  Deeply dig to loosen the soil and fluff it to lighten and find any missed roots.  Do not use commercial potting soil, the texture is much too coarse for successful poppy germination by itself. (More about that later.)

2.  Water the planting site and let it sit overnight to firm the soil and provide ground moisture if the weather has been quite dry.  This step is not necessary in fall through winter months, especially if the weather has been wet.

3.  Using a small leaf rake, your fingers, a household fork or hand-held cultivator tool, scratch the surface to make a very shallow "texture" -  not too deep -  you only want the top 1/4 inch loosened without depressions for the seed to become lost.

4.  Scatter seed evenly across the entire surface.  You can mix the seed with fine sand and sprinkle from a pepper shaker or whatever method you like.

5.  Gently pat down the planting area with your hands to firm the soil and ensure the seeds make contact and do not dry out.  (This is the reason why simply scattering seed throughout your garden does not work.  Seeds will cling to leaves, sit on top of a rock or accidentally be buried while you weed.)

6.  Water with a fine mist from your hose, so as to not form "puddles".  During dry spring weather, keep the soil lightly moist until germination, after which you can let nature water the plants.

Mature poppy seed roots 12" long

Transplanting small seedlings can be done carefully.

This is only possible if the newly germinated seedlings are less than 1/4 inch tall - much bigger and you risk disturbing the newly formed taproot and the developing feeder roots.  (The photograph on the left  is of a 4 foot tall plant at the end of the season, that was pulled out of dry sandy soil, with nearly all the roots intact.  See how there are not a lot of roots radiating out from the taproot, the reason you cannot move mature stems without damage.) 

To transplant, you simply lift out sections of soil with a trowel about 2 to 3 inches across - do not try to separate the seedlings - and simply move the entire mini clump of 10 - 15 seedlings to a new section of prepared fluffy soil.  The strongest seedlings in each clump will continue to grow.


Sowing poppy seeds in containers.

Commercial potting soil is generally more heavily textured than your native garden soil.  When poppy seeds are sown on the surface, they will generally fall between the soil componets and not be accessible to light.  When watered they may become buried even further.  A solution would be to simply sow a 1/4 inch layer of very fine freshwater beach sand (not from salt water) on the surface of the potting soil and then scatter the seed on top of that.  Poppy seeds do a fine job of self sowing on the finely crushed rock of our paths, so you can skip the "patting down" (step #5) but be certain to keep the pot slightly moist.  The soil underneath the sand should stay moist, even if the sand on top appears drier.  If you wish to grow the seed in 4" pots to transplant later, simply sow a few seeds in each container and transplant the entire root ball when the plants roots have begun to fill out the pot.  Do not thin the plants, let the dominant seedlings grow.  Do not try to separate the seedlings either - we tried that - and both halves died, probably because the fragile tap roots were damaged.

Ripening seed pods in the garden.

Gathering seed in fall.

The brown colored pods in the photo are ready for harvest.  We simply cut them close to the pod as the color changes and leave everything in a clean bucket to finish drying.  We then pour the seed pods into a household strainer and the tiny seeds fall through into a new bucket.  It is hard to retrieve all the seed in one or two passes, so the mostly empty pods are then scattered over a cleaned and prepared garden to break down over winter and release the remaining seed.  Of course, you still need to be careful to not accidentally pull out the tiny plants during spring cleaning or bury the not yet germinated seed with mulch.

'Dianna's Purple Poppy' seeds are available from B&D Lilies.   Here is the link to order seed.


Sunday, September 9, 2012

Differences between Oriental and Asiatic lilies

A question that comes up from time to time is how to tell the difference between different lilies when tags have been lost, a gift plant was received, or bulbs were already there when you moved.  The photos show stems without flowers, so you can more easily judge their differences without being distracted by a flower shapes or colors.  In a commercial field, except for the couple dozen plants at the end of the row, all the flowers are removed before the buds open.  We sacrifice the flowers to make larger bulbs at harvest.  Although there can be clonal differences, especially with Interspecific hybrids (hybrids between different classes), the following is a general guide.

Asiatic leaves vary from short to long in length.
Asiatics perform wonderfully in full sun or light shade in all areas, even in very cold climates of USDA Zone 3.  They also do well in most areas of the South, but prefer more winter chilling to reset the blooms. Soil pH is usually not a factor, they grow equally well in both strongly acid and alkaline soil and will bloom several weeks before Oriental lilies.  

Bloom time usually begins in late May through late June and there is either no fragrance or a very light one on windless days.  Asiatics generally have shiny, 4-inch to 5-inch leaves clustered close to one another on the stem.  Leaves may be wide and short or long and skinny like the picture.

Oriental leaves are spaced further apart..

Oriental lilies like cooler summer temperatures and so need to be planted in afternoon shade or all day dappled light in hotter climates.  In mild climate summers, where the average temperature doesn't usually exceed 90 degrees during July and August, Oriental lilies do equally well in full sun or light shade. No winter mulch is required if your climate is warmer than Zone 6, and they are very happy all the way up through Zone 9.

Oriental flowering time is July to early August and the fragrance is spicy and strong on most clones. Leaf shape is typically wider in the middle of the flower (almost heart-shaped) and the leaves are usually spaced further apart on the stem, especially on taller varieties.  Leaf color is typically duller green.

The Oriental lilies shown on the right have a layer of copper-based fungicide applied to the leaves, because a few brown spots of Botrytis began to show during a cool, wet spring - so this foliage has a slight blue cast, which is not the usual color.


OT, Orienpet and Oriental-Trumpet Hybrids (all the same, just different descriptive names) are lilies that  have some Lilium henryi and/or Trumpet lilies in the breeding line.  They are more heat resistant than purebred (or regular) Oriental lilies and tolerate alkaline soils better.  They can take full sun in most areas and are not affected by the occasional 105 degree heat blast, but the flowers will last longer on the stem with afternoon shade if it is over 100 degrees most of the summer.  Fragrance is less spicy than purebred Oriental lilies - more closely related to Easter Lily plants in the stores in spring.

Leaf shape will more resemble Oriental lilies and can be difficult to determine without a flower to match, but in general, they will have a thicker substance to the leaves.  The flowers also tend to be more substantial in thickness as well, giving them their long-lasting qualities in warm weather.

Saturday, September 8, 2012

FREE packet of Purple Poppies - September Special

Just a head's up...

The September special for our newsletter readers will have a special "click on" link for a free packet of Dianna's Purple Poppy Seeds with any new lily bulb order - or by making a $25 or more "add-on" to your existing order - through the month of September.  This freebie is not automatically added, you will need to order the seeds through our website, from our newsletter link after next Tuesday.

If you have never received our free Newsletters and would like to take advantage of this offer, here is our sign up link.  

(Please note that AOL email addresses in the past have not always been properly received from our system, so we suggest using another free email service from Yahoo, Gmail or Hotmail.   Just click on one of the services to create a new email address.)

-Dianna

Thursday, September 6, 2012

New chicken coop


New pullets
After weeks of rain the weather finally cooperated in August and since then we've worked 12-hour days outdoors, fixing the roof on our barn, partitioning a section for chickens off the lean-to, putting up 200+ feet of new board and wire fence and pulling out weeds that more than thrived in the cool weather.
Fence in progress behind shipping building

New coop inside barn.

The perimeter of the new backyard fence was laid with landscape fabric under a 2 foot section of 1/2 inch hardware cloth stapled to the bottom rail.  This will be covered with crushed rock for a reasonably weed free area that will discourage digging predators and give us a "clean" fence line for walking without resorting to spraying herbicide.  The small flock of chickens will help keep the slugs and snails from munching the veggie garden, plus keep the grass down around the stored irrigation pipe behind the building.  Mice tend to stuff seeds and dried grass in the pipes over winter, blocking the water flow to the sprinklers, even when "flushed out" before use.

Outdoor run off barn


It probably would have been much easier to "start from scratch" and build a free-standing coop outside without all the angles, but the lily bulb processing barn has electricity and we are in and out everyday.


Lily Bulb Harvest is just around the corner and the test bulbs dug the past week have been a surprise - because of the cool weather, many of the projected Exhibition-size bulbs uploaded in early summer have divided and we cut off sales on those right away, so as to not disappoint customers.  We'll fill the earliest received orders on the over sized bulbs electronically to see if there are any left after harvest, then any that might still be available will be uploaded on the website.

 
The most recent cover crop was dug into the ground in August for next spring's planting.  Literally, tons of biomass was added to this section of field over the last two years making the soil wonderfully soft and crumbly.


Friday, August 3, 2012

Flat Lily Stem with a hundred flowers... What's up?

Photo by customer G.P. (Brier, WA)


What a shocker - look at the number of buds! 

A lily which was "normal" during the last bloom could have four times (or more) the number of flowers on a strange looking flat stem in a given year.  No, it's not a mutant, just the product of a set of circumstances that only happens perhaps to one in ten thousand lily bulbs in a given year.

Theory is, the plant may have been in the process of dividing into 2 separate bulbs but just the right conditions - usually stressful weather (too hot or too cold) - may trigger this phenomenon.  The closely spaced flowers will generally all open, even so tightly packed together but chances are that next summer this lily will once again be a normal stem.

Photo by customer G.P. (Brier, WA)


See the little bulblets with tiny stems emerging from the base of the lily?  Don't "weed" them out because in two to three more years they will be blooming size.  Grown to maturity, there is no guarantee that they will also exhibit this flat-stemmed curiosity in a given year, but who can turn down "free bulbs"? 


Saturday, July 21, 2012

Double-flowered Lilies - Some that are natural, and some not.

Cocktail Twins (Asiatic)
 The typical Lily flower is 6-petaled (more specifically, 3 petals and 3 sepals), in recent years however  hybridizers have selected out clones that genetically favor extra petals formed in the middle of the flower fusing together the filaments and anthers (pollen bearing part) together into sort of a "petaloid" crest.  Some varieties like 'Cocktail Twins' (Asiatic) have just an extra fluff in the center, others like 'Miss Lucy' (Oriental) are more dramatic, with many full-sized narrow petals.


Catalog photo - most representative of the flower.


One of the problems of breeding such Multi-petaled Flowers is that most are sterile - they do not produce pollen to use on another double flower - and the breeding records from hybridizers are always closely held trade secrets. 


See the three different photos of 'Miss Lucy'?

'Miss Lucy' in a cool summer.
Hybridizer's promotion photograph


In a cool summer, it seems that more "green" shows in the center of the petal and in a "warm" summer the green coloration becomes bleached by the sun before even opening and is either not seen at all or is a very light shade.


The image to the right is a "promotion" photograph, probably grown under precise conditions in a greenhouse, then shot in a studio, showing perfect petals.

Not all double flowers from year to year are due to a genetic "flaw" as it used to be called.  Alternating warm and cold weather can produce doubled flowers on a temporary basis.  Usually, one one or two initial blooms on a stem will be multi-petaled, with the later ones opening normally, as the weather evens out.  There is even a variance from year to year on the named clones. 

The small Chinese Red flowers shown above are Lilium pumilum, the flower on the left is normal, the one on the right side has extra petals.  This is simply weather-related, not any type of mutation that will come back year after year.  The bulbs were left over from last fall and not "discovered" until we were cleaning out the big cooler in preparation for turning off the cooling for the summer, so they were planted very late (late June) and immediately started growing through a short period of warm weather (2 weeks), then back to rain, cold, hail etc.  Some of the stems did not even bloom, because they were planted too late to grow properly, the reason why we advise against planting lily bulbs after Mid May if it can be avoided.  L. pumilum is not available for sale this fall, but should be back for Spring or Fall 2013 planting, along with more Doubles from the Oriental and Asiatic lines. A couple other cultivars available for planting this fall are shown below.

'Little Yellow Kiss'

'Double Strawberry Vanilla'


Saturday, July 14, 2012

How to Fertilize Lily Bulbs & When


Pink lily sprouts just beginning to emerge on a sunny day.
Time & Type Matter
A complete fertilizer, such as Vegetable 5-10-10 or a complete Rose food formula, is first applied when the sprouts begin to emerge, and again just as the flowers are openingChoose a brand where the first number (nitrogen) is lower because with a high nitrogen content lily bulbs will grow nice leaves but not good flowers - and growing too fast from high nitrogen fertilizers weakens the bulb's overall health. (All candy and no protein - so to speak - check the chemical breakdown before you purchase any product.) 

Generally, the least expensive place to buy products is in 50 pound bulk size bags at farm stores.  Do not be alarmed with such a large amount, but simply line a 5 gallon bucket with a trash bag, pour in the fertilizer, twist the top to seal out moisture and put a lid on top.  Keep in the corner of your garage or shed and you'll have several years of fertilizer for the cost of a yearly 8 pound box.  


The above photo shows sawdust shavings that are packed with our lily bulbs for cushioning and to regulate moisture.  Simply empty the bag over the newly planted bulbs as simple mulch and when you stand back, it is easy to see where they are planted.  This system of marking sleeping lily bulbs is handy to avoid stepping on a newly emerging stem in spring.  The mulch was pulled away so you can see the white granules of dry fertilizer sprinkled on the soil.  Wait until most of your lilies have emerged and are 1 to 6 inches tall before spreading fertilizer so that you do not accidentally miss a group.

Organic Gardening
Organic formulas are more expensive and the official analysis might not look as "effective", but many organic formulas also include Trace Minerals which will increase disease resistance and help take up nutrients more effectively.  They are especially worth their cost in small gardens where you have limited space for both food crops and flowers and need to practice careful and precise crop rotation for the vegetable garden to grow well.  Time release formulas can be a bit chancy, especially in areas with cooler summers because most of them need to have a certain soil temperature to release well and lily bulbs do best with specific fertilizing.

How much to use for lilies?
One tablespoon of a complete balanced fertilizer for each large stem is plenty for soils with a clay base; you want to target the lilies while they are growing fast in spring making a stem.  Fertilize again in midsummer when the flowers are beginning to open and the bulb has exhausted its stored food and needs to build itself back up before winter.  Areas of high rainfall or sandy soil may require an additional feeding about two weeks later. 

Resist the urge to use more fertilizer in the hopes of faster growth or to "correct" perceived weak growth or odd leaf coloration.  You can also use a "manure tea" or kelp (seaweed) sprayed onto the still-green leaves late in the summer, however be mindful of wind; Dianna accidentally sprayed the large living room window with Fish emulsion many years ago and spent the next morning with a razor blade scraper taking all the little brown spots off the glass. 

Case in point
One of our sons made cookies for Boy Scouts when he was seven years old.  Reading the recipe, but not the sizes on the ring of measuring spoons, he put in a Tablespoon of Baking Soda instead of only a Teaspoon - the cookies tasted very good - but you can imagine the gastric repercussions emitting from the family that evening.  (Just like baking soda, too much fertilizer is not a good thing.)

If your leaves are turning yellow (and dropping) from the ground up is the classic symptom of having too much moisture surrounding the bulb and adding more fertilizer will burn the already stressed roots.  Brown speckles on leaves or buds are usually Botrytis (fungus), and no amount of fertilizer will help - only a good fungicide.  If in doubt, please send us a photo by email, with your soil type, mulch and local weather conditions and we'll be better able to help you determine what might be affecting the lilies.

Organics - about 1/4 cup per large stem of follow package.
Midsummer Top Dressing with Organics

When lily flowers are beginning to open, the bulb has exhausted itself putting up a stem, and now needs a boast of nutrients. Remember that the feeder roots are just below the soil surface so simply scratching in the fertilizer or watering it in will put the food in the best place.

Processed manure products and regular granular chemical formulas are just fine used together or alone in a given year, but if you have a rainy winter or spring much of the fertilizer will leached out, so spreading compost or manure during the summer is a better plan, plus it helps to correct any deficiencies. For manure tea, use about a half cup of fresh or aged manure in a quart jar of warm water, stir and let set for an hour, then spray.  You want the manure to dissolve as much as possible.

Handfuls of alfalfa pellets (rabbit food) around the stems will help with nitrogen - but is not recommended should you be plagued with wild bunnies.  However, if they are eating the alfalfa pellets, maybe they’ll leave the stems alone?  (Just joking, don’t try it unless you are braver than me.)   Greensand (a sandstone rock product) and a light dusting of fresh grass clippings will make a difference, dried grass clippings can be deeper, but you lose some of the benefits.  Grass clippings from recent “weed and feed” applications are not recommended however.  

Many years ago a customer put up an expensive cement block fence to keep deer and running dogs out of the flower beds surrounding his home, but the deer would simply walk up the paved driveway, so he installed an automatic gate for the cars.  It worked perfectly - so he happily planted new lily bulbs, roses and peonies in the spring, carefully amending the soil with compost and other "good stuff".  Sometime later he called to say he had a problem.  What happened?  The raccoons were climbing the trees, dropping down onto the cement block fence, scooting down a shed roof, sniffing out the Blood and Bone Meal and digging up all his plants.    

Avoid using blood meal or bone meal if you have raccoons or enthusiastic dogs because they will tend to dig your bulbs if they smell anything interesting underground - one of the main reasons to avoid any type of meat scraps in your compost pile.

If you miss spreading fertilizer completely and it is late in the summer, don't worry; wait until next year.  Keep in mind that chemical fertilizer granules are not as effective if spread or dug into the soil in the fall.  This is because winter rainfall will tend to wash away nutrients before your lily bulbs are ready to use the food.  Do a simple application of compost or well-rotted manure around the stems and the stem roots next spring will be able to access the nutrients.

Friday, July 13, 2012

Ice chunks falling from the sky...


What a night.  Thunder and lighting to just before dawn, with a few showers thrown in for good measure, then just when we thought the worst of the storm had passed us by, chunky hailstones the size of chickpeas dropped just when it became light enough to see.  Because we rarely experience electrical storms for such a long time, this weather is more like Minnesota than the Northwest corner of Washington State .  (The elements are still rumbling out there, so this posting will be quick.  I've already lost my satellite internet once today and had to shut the computers down.)

Lilies whose flowers were already opened suffered bruising, but because we are somewhat late for bloom this spring, the ones still in tight bud have a chance to open normally.
Before the storm.
24 hours later, 2 hours after hail storm
The lily on the right was photographed yesterday and today the same stem (shown below) is covered in brown spots.  The upper right flower just opening in the top photo is the same one shown front and center in the next photo down.  Damage would not have been so fast nor dramatic had the hail stones been a bit smaller.  Note that the lower facing blossoms were not damaged and should continue to look nice.  (In our commercial propagation fields, we had already begun removing the unopened flower buds to encourage the bulbs to grow larger for our fall harvest, so we have no reason to worry about October's crop.)

IMPORTANT:  Spray a good copper based fungicide ASAP after any moisture on the flowers and stems has dried - the same as you would for roses.  With tiny hailstones, you might not notice damage right away, but the bruises could set the stage for fungus later on.  Look for "wet-looking" darker colored spots on the leaves and flowers now; later if Botrytis begins, those spots will turn brown and/or have clear centers.  
 
 [update 7.14.12]
48 hours later - notice how the "older" spots have turned brown?  The second bout of hail several hours later caused the clear, moist areas on the petals, but they are expected to also begin turning brown with a day or so. 

Simply remove any open flowers that were damaged (or shredded) by hail, leaving unopened buds intact and spray the buds, leaves and surrounding soil with a good fungicide ASAP.  The underground bulbs will not be damaged and will continue to grow larger for next summer's bloom if the leaves are left on the stems.  

Buds that were tightly closed during the storm should open normally but we still recommend spraying a copper-based fungicide as a precaution.  Baking soda solutions (1T per gallon of water) can be a good preventative, but its need to be applied more frequently.  Farm stores are a good place to find copper products, "big box" lumber stores -  in my opinion are not so good - they are more geared to "death and destruction" chemicals.


Monday, July 9, 2012

Casual Lily photography - How to do it easily and inexpensively


Two inexpensive older digital camera
Choosing a camera: Unless you are planning to sell your photographs, expensive camera models with interchangeable lenses and many options are not necessary to create pleasing flower portraits.  Many low cost digital cameras now offer a "macro" setting - which is basically a built in "close up" lens.  You will be able to get as close as 4 to 6 inches away from the flower and still have a reasonably sharp image for capturing details such as personality spots or a cooperative ladybug.

A simple tripod is highly advised for achieving the sharpest images and will help to increase the quality of your photographs because automatic settings that "adjust" for hand shake can only go so far to compensate.  Quality used tripods can be found in second hand stores for very little money, so do not be alarmed at the price of that fancy new one, but do make sure the removable "pad" that is used to attach the camera is included.

Before you snap that shutter...

Lilium lankongense
#1 - What is your background?  We are so used to our surroundings, that we generally only see the beauty of the lily and our mind conveniently blocks out the view of the wheelbarrow, filled with prunings and sitting 10 feet away.   With the camera on the tripod, look critically through the lens - ignoring the subject flower for a moment - and check to see what else is about to recorded.  If you have a simple background of shrubs, lawn, treeline or hedge, the focus should be on your subject with the other objects secondary.  Many times when doing closeup work, you can "fuzz out" the offending background, reducing it to just an abstract of colors or use textured watercolor paper as a backdrop like this single downfacing flower of Lilium lankongense.  A pleasing vista is still preferred for the best compositions - and by including a reference point, your photos will become more interesting.

Note the difference between the two images of this stand of Lilium pardalinum?  The right hand photograph is more enjoyable with the scoop shovel and old stump because you can see just how tall the stems are growing in the garden.  [Most photos will enlarge if you click on them. -dg]
Lilium pardalinum growing in a garden in Port Orchard, WA

Same 'Mrs. R.O. Backhouse' - cloudy day.
See the pollen on it's tummy?
#2 - Check the weather.  Overcast days will tend to give a blue cast to white flowers, but the natural daylight is also softer and more evenly spread than in bright sun, and there are no sharp shadows.  In general, just after sunrise and before sunset are the best times for photographing warm colors, plus the petal textures will be more evident.  Bright, sunny days are not the best times to photograph your garden.  See the butterfly (with its pollen covered tummy) on this close up of a Martagon lily?  It had rained all night and the butterflies did not come out until the sun did, so the lighting was not the best and the image not as crisp.  The next photo (same variety of lily) was taken on an overcast day and since there were no shadows, the color is not brassy.  Can't tell the difference?  Compare the leaves on both photos if the flowers look the same to you.  Should a bright sunny day be your only option then ask someone to hold a translucent white "photography" umbrella or a rigid sheet of greenhouse plastic to cast even light on your subject.  Frame your photograph and be careful that your own shadow doesn't fall on the ground... and give away your secret!

#3 - Wind is not your friend.  On a pleasant day wind generally comes in gusts, so with a simple point and shoot camera, hold down the shutter button part way to set the focus (use a tripod if you can't hold still) and wait until the wind has quieted down.  The beauty of digital is that you can keep repeating the shot until you have a winner.  In the old days of slide film, it became rather expensive to toss out blurry slides when they came back from the photo lab.

Unlabeled Asiatic lily.
#4 - Composition.  Try not to put your subject "dead center" in the frame - unless you are archiving a record of flowers from your garden for hybridizing purposes - and thus need an image of relative flower shape and growth habit.  The most pleasing shots have a bit of background showing and with the flowers and stems at an angle.  There are many art books that give instructions on how to paint a pleasing canvas and the same composition techniques apply to photography.

This yellow lily is well balanced, but the open flower is out of focus; it would have been better to change the angle of the camera to put both the buds and the flowers the same distance from the lens, which would not have changed the look of the background trees or the meadow grasses.

#5 - Last check.  Are there brown leaves or stems, bird droppings on the leaves, weeds, or your shoes showing in the camera lens frame?  Move them - or you - before you press the shutter.  Are there pollen grains on the petals that make the flower look less "fresh"?  A soft artist paintbrush on a dry day can be used to gently brush off pollen if it hasn't already stained the petals from overhead watering and rainfall.  Do you like what is framed on the camera?  Would it be better from another angle?  Move the tripod slightly to the side to make the photograph more interesting.  And... the one item that most people forget... record the name of the flower that you have just photographed!  If in a public garden, many of the flowers, trees and shrubs will be labeled.  In a friend's garden, ask while you are shooting because similar varieties can be hard to distinguish from one another in photographs.

Interesting decomposing stump behind this old iron wheel.
Have fun and don't be too critical of yourself - or you'll end up buying an abundance of photography equipment trying to make things perfect.  Remember that some of the best photos also show a few "defects" - brambles growing around the front end of an old tractor or a single red tulip in a bed of pink ones (keeping the oddball out of the very middle of the shot for a more pleasing composition).  Even the dead fern fronds behind this old wagon wheel can add interest.  Whatever should suddenly catch your eye may have the possibility for a good photo, so keep your camera charged and don't be afraid to experiment.

What to do with your best photos?  Print, mat, and enter them into the local county or state fair to see what happens.  Judges are usually pretty open with suggestions on how to improve your photography skills and can be a good resource.

[Except for the image of L. lankongense, all the photographs in this article were taken with one of the two cameras shown at the top of this page.  -Dianna]


Tuesday, June 26, 2012

Wahoo! Martagon Lilies are Blooming in the Garden

Lilium martagon x 'Mrs. R.O. Backhouse'
Martagon lilies are the first to bloom here on the farm, liking light shade in hot climates or full sun in cooler areas, they have a multitude of nodding "turk's cap" one-inch blooms that dance in the wind. Long-lived in nature, some beds in Europe are over 100 years old.  Growing best when undisturbed, they are lovely in dappled afternoon shade where the stems can elongate a bit while stretching for the light.  Butterflies and Hummingbirds love to investigate these flowers, so they are a good addition to the garden close to a window or near an outdoor patio setting.
Lilium martagon (most commonly found)


The old home of Mr. Jan de Graaff, early breeder of lilies in the Western USA and owner of Oregon Bulb Farms in the 1960's,  had a large colony of L. martagon 'Paisley Hybrids' and the pink species growing "wild" over the hill where the scraps from the fall harvest were discarded after sorting.  Damaged bulbs, broken scales, tiny bulblets, stems, leaves, roots and field "dirt" were allowed to fall freely off the conveyer belts for years directly into a deep gully where they quickly recovered to thrive in the light woodland shade.

Not surprisingly, the bulblets of Asiatic, Trumpet and Oriental hybrids never seemed to really make a foothold, but this was also in the very early days of hybridization, well before inter-specific hybrids like Oriental-Trumpets (OT or Orienpets) first made their appearance.  Based on our own compost piles of leavings at the edge of the field, it's possible that these relatively recent clones might have been just as vigorous under the same conditions if given enough natural rainfall.

Lilium martagon mature their stems early, so a bit of drought mid summer does little harm.  For years a small group of bulbs that were missed during harvest bloomed within the grass at the edge of our field.  That section of row had been turned into a tractor lane and was not watered more than by accident when the wind blew the wrong way.  By the time they we finally rescued the lilies, they had multiplied nicely and were given a "better" spot in the garden, which turned out to be too wet and the bulbs began to decline.  Case in point - go easy on the moisture-retentive materials like compost and manure and do not allow the soil to remain soggy for an extended period of time.

Lilium martagon album (variant)
These lilies appreciate humus if your soil is sandy, but do not use straight peat moss or commercial potting soil with peat as an ingredient because they like a slightly alkaline soil.  Well composted leaves from your garden -  or a nearby deciduous forest - mixed into the planting area is perfect or use as a "top dressing" in early summer.

Note the white "fuzzies" on the petal tips in the photo on the left and the leaf in the background?  This is pubescence and is not harmful, in fact, it may completely cover the entire bud of some varieties while they are still tightly closed.  This photo was taken in a greenhouse - a crowded one - and being so shady, the color came out a bit too "blue".

In the bottom photo you can see just how tiny the flowers really are.  This photograph was taken at 5PM just as clouds began to roll in and a few drops of rain were beginning to fall.  The color is true.

Tiny flowers on Martagon lilies

We only offer Martagon lilies in fall because they seem to settle in more quickly with cool temperature planting.  This spring we had reports of a few bulbs that were fall planted in the Eastern States, that started budding almost as soon as they emerged from the soil, one of the common problems with spring planted Martagons.  The crazy late winter/early spring weather - too warm too early - triggered bud set before the stems had a chance to elongate.  Next summer they will be normal.  The lilies on the right never seem to grow taller than 2 feet, but most Martagons reach 3 to 4 feet tall in full sun.

Choose a spot that will not be over run by other plants or shaded too much by trees when planting these special lilies.  They can be happy for a decade or longer in the same spot with regular weeding, fertilizer, and a bit less water than other lilies in late summer. 


Saturday, June 16, 2012

3 Simple Rules - Lily Bulbs & Companion Plants

7 foot Lilium regale in afternoon shade
Country Farm vs. City House
Tucked into a little valley within the foothills of the Olympic Mountains, we are blessed with sub-irrigated gardens and 50 to 60 inches of rain between October and April.  Yet, twenty minutes away in Sequim, annual rainfall is only 16 inches, so plants that struggle with soggy ground (Lavender, for example) are perfectly suited to Sequim, and those that enjoy plentiful moisture, bask in the extra humidity on our farm. Rhododendrons, Azalea, Vine Maple, Bigleaf Maple, Alder and Stinging Nettles are naturally abundant.  Perennials, shrubs and trees usually grow taller and faster; identical cultivars of shrubs that stayed compact when we lived within the much drier city limits (19 annual inches), quickly outgrew their allotted space on the farm, so adjustments needed to be made.  It is hard to believe that only 20 miles away the growing conditions can be so different.

You need to consider not only your official USDA Hardiness Zone, but also in what ways your garden differs from your neighbors or immediate region - wetter, drier, colder, hotter - and plan accordingly when choosing companion plants for the lily garden. 

 
Rule #1:  Avoid vigorous annuals, perennial or vines

Lilies are not like tulips, they do not have a hard outer shell, so crabgrass and overly enthusiastic plants can actually penetrate the softer lily bulbs.  We've found bulbs with white root grass growing through a bulb that we could actually pull from side to side like dental floss - very entertaining - but not a good thing.  Traditional "ground covers" that form thick mats in an attempt to reduce weed germination are death to lily bulbs because they are unable to penetrate the underground tangle of roots.  Not only are the thick lily sprouts tender, but the surrounding foliage is a good hiding place for slugs and snails.  Look for plants that grow from a crown and do not spread very quickly and be cautious of well-meaning neighbors who offer to share a plant because they have "too much".

Alstroemeria aurea in southern Tasmania, Australia - JJ Harrison
Dianna still insists that she moved out of the city house to get away from Alstroemeria aurantica, which expanded exponentially in the drier hilltop soil, trying to choke out the lily bulbs in the front yard and shooting extremely viable seed up to 15 feet away.  One neighbor saw the ripped out plants being stuffed into trash bags for the landfill and begged a few.

We warned him... Oh yes, we warned him.

Three years later he called to say that his "attorney would be contacting" us. (Smile.)

Wouldn't you know, those pesky roots found a blemish in his foundation, and there for everyone to see was a very healthy blooming Alstroemeria emerging from a crack in his basement studio.  Live and learn, and ask your neighbors about the better behaved plants when you move into a new home - plus the "weedy" ones that may be considered a local blight. 


Rule #2:  Check height and sun requirements

Perennials and Annuals should not be greater than 2 feet tall if your lily stems average 3 to 4 feet.  If surrounding perennials grow too tall the lilies may have too much shade on the lower portion of their stems and air circulation could be compromised - risking Botrytis (fungus) in certain years.  An exception would be plants with lacy foliage like annual Cosmos or wide branched shrubs where light and air are not impeded.  Taller growing lilies, such as Trumpets, can be a good background plant next to a fence with taller perennials or shrubs in the front,  Lilium regale is the classic lily for backgrounds, growing 6 feet or more in height when established.  Some "shade" plants that are diminutive in stature may do well actually being shaded by taller growing lilies, but in general, Annuals, Perennials and smaller shrubs should be rated "Full Sun" or "Part Sun" in order to grow normally together.

Grape Hyacinth (Muscari) Copyright (C) 2005 Raffi Kojian
Just remember Rule #1 and do not crowd other plants in too close to the lily stems, give them room to seek the sun as the sprouts emerge.  Ideally, the lilies should be a foot or so tall before the surrounding annuals and perennials have gained very much height.  You can closely plant smaller, earlier blooming bulbs near to the lilies, but keep in mind that it will be more difficult to dig and divide the lilies later.  The ripening foliage of Crocus, Squill (Scilla) Grape Hyacinth (Muscari) possibly covering the emerging sprout tips may lead to fungus concerns in areas with heavy spring rainfall.  This is rarely a difficulty in drier climates, but here we keep the area surrounding lily stems clear of both foliage and mulch.  Just a light sprinkling of sawdust shavings  (what is in your bag when we package the lily bulbs) marks their location and make it easier to not accidentally step on sprouts while spring weeding.


Rule #3:  Consider water requirements 

'Golden Eye' Rose in our front yard last summer.
Lily bulbs are drought tolerant, they store moisture within the leaf-like, overlapping "scales" that make up the bulb and thus do not need watering until the soil is dry one or two inches below the surface.  Plants like Astilbe and Iris ensata need more moisture than lilies to grow well, so place those in wetter locations, away from the lily bed.  Also please do not plant lilies within the range of an automatic sprinkling system for lawns that is on a fixed schedule.  Lawn grass is more shallow rooted and it requires more frequently applied moisture to stay green all summer.

Roses, Peonies, Daylilies, Poppies, (both perennial Oriental types and annual types like our Purple Poppies) can be deep rooted and coexist quite happily with lily bulbs.  If you water deeply on a less frequent schedule,  your shrubs and trees will usually send roots down to a deeper level, providing a measure of protections against times of short term drought and save money on your water bill. 

Dianna's Recommended Plants - How many do you already grow?

ANNUALS
Alyssum (Lobularia)
Cosmos – ‘Sonata Series’ is very compact
Dahlia choose varieties that only grow 12-14 inches tall or use as backdrop
Dianthus barbatus ‘Wee Willie’ – plus other shorter growing cultivars
Dillherb with lacy foliage and can't have too much of this when its time to make pickles
Geranium (Pelargonium) – many named cultivars, take your pick
Marigold (Tagetes)  – short varieties are best
Nigella – “Love in a mist” has lacy foliage and pretty pink, white and purple flowers
Pansy great in coastal areas
Papaver  (Poppies) – deep rooted, so will not overrun the bulbs, but some grow quite tall
Penstemon  – choose shorter growing cultivars
Primroses (Primula) – great in coastal areas
Snapdragons  (Floral Showers Series) – old standard types can overwhelm if planted too close
Violets (Viola) – great in coastal areas
Zinnia – choose shorter varieties please

BULBS - all bloom much earlier than lilies and go dormant in summer
Snowdrops (Galanthus)
Grape Hyacinth (Muscari)
Narcissus – choose tiny varieties
Species Tulipsnot the tall hybrids

PERENNIALS
Alchemilla  erythoropoda  (Lady’s Mantle) compact form
Aquilegia (Columbine) – all forms, I love ‘em!  They seed freely and have great foliage.
Aster (Alpinus and Wood’s Series) – both compact
Aubrieta blooms early and tends to be evergreen, making dense cushions of flowers
Bellis Daisy blooms in spring, not extremely long-lived, but can reseed
Campanula carpaticaavoid C. persicifolia, it even self-sows in our gravel driveway
Gaillardia ‘Arizona Sun’ – needs well drained soil when dormant, I lost mine last winter
Hemerocallis (Daylily)  – short varieties, plant at least 18” from bulbs - they will spread
Heuchera (Coral Bells) – plant at least 12” – 18” from bulbs, makes dense clumps
Peony – keep lily bulbs at least 24” away from peonies which do not need dividing
Papaver – (Oriental poppies) – plant bulbs at least 24’ away from the clump
Primula (Primrose) – likes moist soil in spring, probably best in coastal areas
Pulstatilla – attractive seed heads follow spring flowers, well behaved here
Saxifraga not the “mossy" types that need moist shade
Violets – watch the reseeding

SHRUBS – plant bulbs at least 24” away
Roses – choose Miniatures, Hybrid Tea or shorter growing Rugosa types, depending on your climate
Hardy Fuchsia  – lovely in coastal areas as a backdrop
Azalea –  the bright orange really cheers up our rainy days in spring and some have nice bronze edged foliage in summer
Barberry (Berberis) - Need a thorn barrier?  Cultivars with purple pink leaves are my favorite.
Lavender likes it hot and dry for best flowers, so plant just outside of sprinkler systems or uphill of lilies in a rockery

These are just some of our favorites,   and bear in mind that some cultivars may become weedy or not be advisable for your local area - so be sure to check with a knowledgeable neighbor or extension service. 

Do you have other recommendations that you would like to share?  

Please add a comment in the box below and mention in what USDA Hardiness Zone you are located or the general area you live. 

(Your experience may be just the news another gardener was waiting to read.)